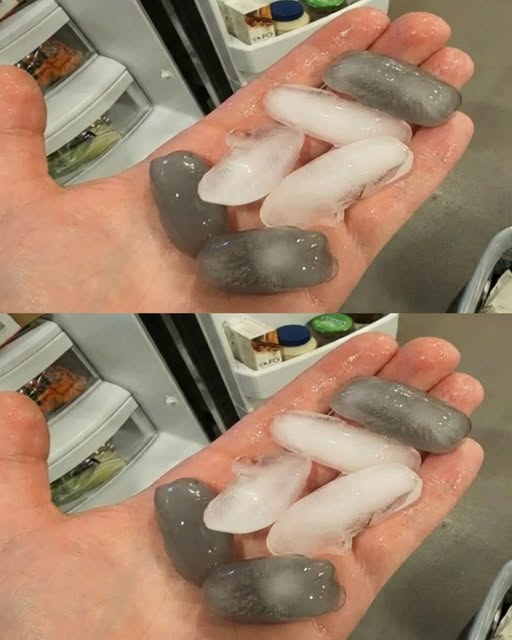
Step 1: Clean the Ice Bin
- Turn off the ice maker or unplug the fridge.
- Remove the ice bin and discard old ice.
- Wash with warm, soapy water and a soft sponge, then rinse thoroughly.
- Let it air-dry completely before reinserting.
Step 2: Wipe Down the Ice Maker Area
- Clean the ice dispenser chute, surrounding freezer walls, and door gaskets with a damp microfiber cloth to remove dust and debris.
Step 3: Check and Replace the Water Filter
- Locate the filter (usually in the grille or inside the fridge).
- Replace if older than six months or after initial installation.
- Flush the system by running 3–5 gallons of water until it runs clear.
Step 4: Reset and Wait
- Turn the ice maker back on.
- Discard the first 1–2 batches of new ice—they may still contain residue.
- Store fresh ice in a clean, covered container to prevent odor absorption.
Pro Tips for Perfect Ice
- Use filtered water even if your fridge has a built-in filter.
- Clean the ice bin monthly to prevent buildup.
- Keep your freezer organized; open food packages increase airborne particles.
- Check door seals regularly—worn gaskets let in warm, dusty air that affects ice quality.

When to Worry
Gray ice is usually harmless, but call a technician if you notice:
- Slimy texture or foul odor → possible mold or bacterial growth.
- Persistent discoloration after cleaning → potential ice maker malfunction.
- Metallic taste → possible plumbing or filter issue.
The Bottom Line
Gray ice isn’t a sign of danger—it’s a sign your ice maker needs attention. Fifteen minutes of cleaning and a fresh water filter can restore crystal-clear, refreshing ice in no time.
Have you dealt with gray ice before? Share your tips and tricks in the comments and help others keep their drinks crisp, clean, and perfectly clear.